Cut the waste. Crush the defects. Level up your manufacturing process.
About the project
The Zero Defects Zero Waste (ZDZW) project aims to revolutionize the manufacturing process with cutting edge non-destructive inspection technologies that will successfully reduce waste and defects, enhancing productivity and quality.
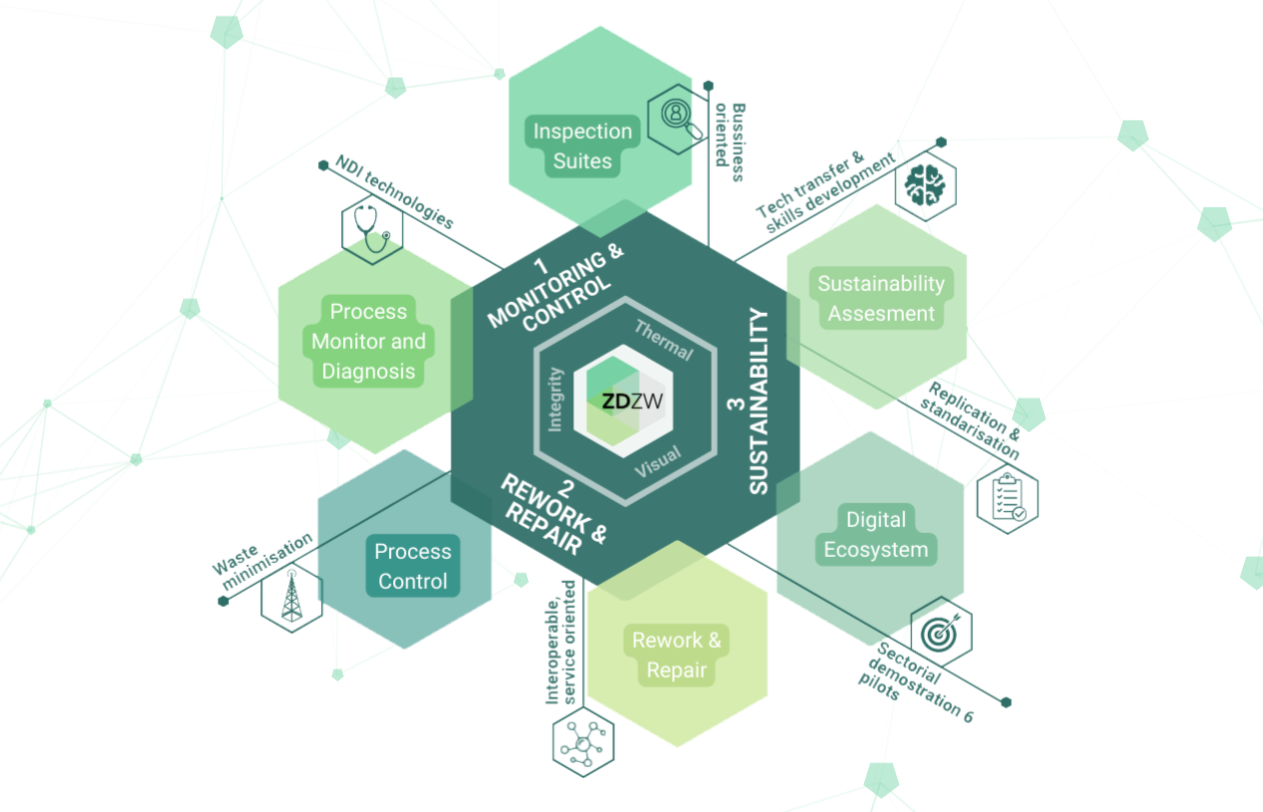
Dive into the ZDZW Project Beta Testing Campaign and learn all the benefits it offers to your manufacturing process.
Be a part of the Beta testing pilot and benefit from:

7%
Increase in productivity

25%
Decrease in energy consumption

50%
Reduction in material waste
RECEIVE

FREE TESTING
For a select number of testers

PERSONALISED OFFER
From leading European Technology providers
Discover all the 11 solutions and choose the one that fits better your manufacturing process characteristics.
Integrity Inspection Suite
Monitor and control key processes like induction hardening, ensure internal component integrity with acoustic emission-based inspections, detect sub-surface defects using MIR-OCT, and automate the inspection of critical welded joints. Experience precision, innovation, and efficiency redefined for the future of manufacturing.
MECHANICAL HARDNESS INSPECTOR
MECHANICAL HARDNESS INSPECTOR
Reduces the material waste to 1% and the energy consumption by approximately 25%.
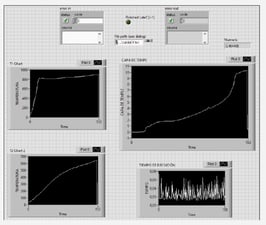
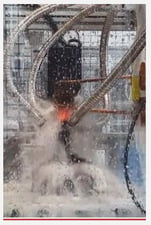
The Mechanical Hardness Inspector offers an innovative inspection solution utilizing digital twin technology to delineate microstructural and hardness evolution during induction heat treatments.
Through the utilization of digital twins and Recurrent Neural Networks (RNNs), the production process becomes digitized, enabling real-time monitoring and analysis. This integration facilitates quicker analysis and informed decision-making, thereby amplifying production efficiency.
This inspection, powered by digital twin, serves as a valuable tool for industrial partners implementing induction heat treatments.
MAIN BENEFITS
With this digital twin it’s now possible to reduce waste in a real time inspection
- Automatic Unitary inspection
- Automatic in-depth hardness estimation
- Real-time non-destructive inspection
- Early process failures detection
MAIN FEATURES
- Real time
- Unitary
- In depth
- Non destructive
PRODUCT OWNER

To download this information click HERE
AE - BASED INTEGRITY ASSESSMENT
AE - BASED INTEGRITY ASSESSMENT
Condition monitoring for rotating machinery detecting early-stage damage in industrial components using AE signal analysis
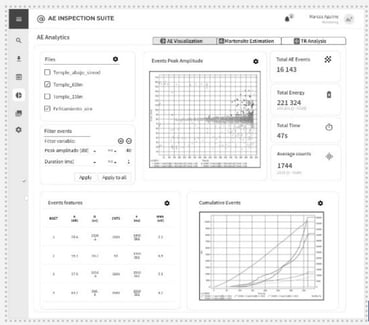
This solution predicts the quality of the product and anticipates possible defects arising during its manufacturing process by means of Acoustic Emissions (AE).
It integrates AI tools and data analytics services to establish quality control techniques, facilitating the inference of correlations among diverse signal parameters, such as signal amplitude, duration, counts, energy, and rise-time, among others.
It allows operators to stop the production and adjust the manufacturing process thus avoiding the discard of a whole batch of difficult to reprocess material.
MAIN BENEFITS
With AE-BASED INTEGRITY ASSESMENT it’s now possible to detect defects in an early stage
- Automates martensite estimation
- NDT in-situ hardness estimation.
- Data-based martensite estimation (no experience needed)
- Avoid the discarding of whole batches
- Detects defects in an early stage
MAIN FEATURES
- NDT martensite estimation
- Early fault detection
- Quality assessment
- AI model training and prediction
PRODUCT OWNERS

To download this information click HERE
MIR-OCT
MIR-OCT
Real-time, non-contact, and non-destructive inspection of ceramic parts with ultra-high-resolution images, significantly reducing defect-related delays and energy waste
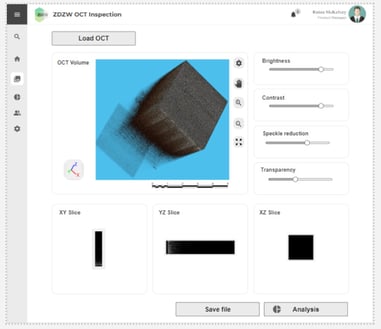
MIR-OCT introduces an in-line, non-contact, and non-destructive optical sub-surface inspection technology. This innovative tool caters to companies involved in additive ceramic manufacturing equipment and those requiring sub-surface inspection of coatings.
In contrast to the utilization of traditional microscope-based post-manufacturing inspection methods, MIR-OCT provides real-time fault detection, leading to streamlined manufacturing processes and reduced waste.
By incorporating this technology, companies can notably elevate the productivity of zero-defect components while concurrently minimizing energy consumption.
MAIN BENEFITS
The applicability of MIR-OCT is sample dependent, requiring a combination of relatively low optical loss and scattering.
- Sample-dependent, requiring a combination of relatively low optical loss and scattering
- Fast, efficient, reliable and not dependent on an operator for defect detection and aI algorithm for part quality inspection
- Optical fault detection and minimisation of delays in delivery of zero-defect products to the customer
- Easy optimization of manufacturing parameters and reducing energy/manufacturing waste
- Information can be forwarded to the operator in real time
MAIN FEATURES
- In-line, non-contact, and non-destructive inspection providing high-resolution sub-surface images of the ceramic parts during printing and sophisticated chemical micro-mapping.
- AI algorithm to classify the captured images by matching them against a database for possible product defects.
- Live real-time monitoring
- Early error detection through a data visualisation and analysis tool
.jpeg?width=378&height=328&name=Image%2023-8-23%20at%2014.40%20(1).jpeg)
PRODUCT OWNERS
![]()
To download this information click HERE
EMAT UT
EMAT UT
Reduces scrap production by approximately 60%, minimises rework times and improves process yield based on a better defect detection and characterisation
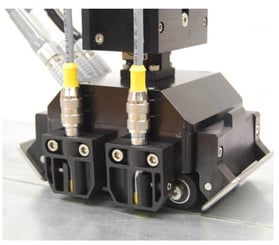
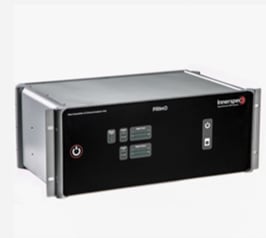
Ultrasonic-based system for in-line multi-pass weld inspection with defect characterization.
This EMAT UT system caters to the windmill tower manufacturing industry, specifically targeting metal parts manufacturing companies employing multi-pass welding processes.
Designed to operate at high-temperature environments, this system conducts real-time in-line inspections, enabling swift characterization of defects. In comparison to conventional methods, this system offers rapid defect characterization, thereby optimizing efficiency and minimizing production-related setbacks.
MAIN BENEFITS
- Improve on defect characterization (type and size)
- Compare the production statistical analysis with other plants
- Reduce scrap production
- Reduced re-work time
MAIN FEATURES
- Real-time in-line inspection.
- Configurable alarms for defect detection.
- AI-based defects classification tool.
- Production statistical analysis.
PRODUCT OWNER

To download this information click HERE
Visual Inspection Suite
Ensure thorough defect detection in every part introducing cutting-edge techniques like multi-camera 3D scanning and artificial vision. Overcoming limitations, the services prioritize accessibility, providing easily comprehensible defect location information. Elevate manufacturing efficiency with our precise and streamlined visual inspection solutions.
VOLUMETRIC INSPECTOR
VOLUMETRIC INSPECTOR
Analyzes 120 parts per minute, detects 95% of defects, classifies parts by model, and rejects unknown components
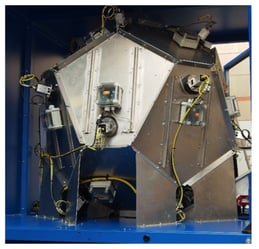
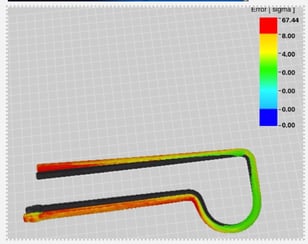
This solution employs diverse quality analysis techniques to assess products against expected 3D shapes, identifying deviations and potential defects that could impact final product quality. Utilizing AI tools, the system learns the anticipated shape and geometric tolerance measurements.
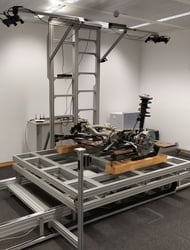
This solution, developed to work in the production line, not only scrutinizes and confirms dimensions but also identifies geometric flaws such as tears and dents. Employing an in-line camera-based inspection approach, it prevents defective pieces from being integrated into the final product. This proactive measure significantly reduces waste and minimizes energy consumption during production.
MAIN BENEFITS:
This has been developed to work in the production line, capturing images in real time without requiring reconfiguration. All this, without increasing costs or slowing the manufacturing process down.
- Captures images in real time without requiring reconfiguration
- Measures and detect trends error before they appear
- Cost reduction: no down-time and no maintenance
- The inspection system is not subject to human error
- Part classification, avoiding product specific solutions
MAIN FEATURES:
- Inline inspection
- Captured object alignment
- Shape comparison
- Deviation evaluation
PRODUCT OWNERS
To download this information click HERE
SURFACE ANOMALY DETECTOR
SURFACE ANOMALY DETECTOR
Analyzing 120 parts per minute, detecting 90% of defects, classifying parts by model, and rejecting unknown components
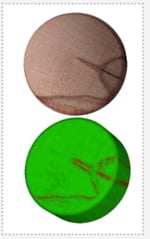
The Surface Anomaly Detector employs a 3D camera-based inspection system alongside AI algorithms to assist manufacturers in ensuring comprehensive quality across their entire production line. It effectively identifies visual defects on the surface of manufactured goods, thereby preventing the inclusion of faulty pieces in the final product.
The system's focus on detecting surface defects, often challenging to identify through volumetric analysis, is complemented by AI-driven algorithms. These algorithms are trained to analyze images and pinpoint abnormal zones in the object, facilitating efficient defect identification.
MAIN BENEFITS
With the 3D Camera, it’s now possible to identify visual defects.
- Part classification, avoiding product specific solutions.
- Live monitoring of all production parts
- Cost reduction: No down-time and no maintenance
- Millimetrical surface defects that human eye cannot detect
MAIN FEATURES
- Inline inspection
- Captured object alignment
- Surface texture learning
- Surface anomaly detection

LEAD COMPANY
![]()
To download this information click HERE
ARTIFICIAL VISION
ARTIFICIAL VISION
Reducing costs, standardising defect detection and maintaining between 90-99% of human capacity, but guaranteeing inspection stability over time
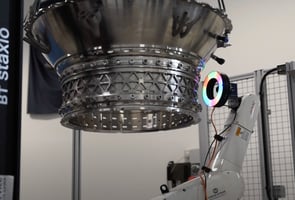
The Edge AI machine vision inspection device is an advanced system designed for rapid identification of visual defects in manufacturing processes. It ensures correct assembly and mitigates the inclusion of faulty components in the final product.
Tailored for industries such as aerospace mechanical components, high-precision manufacturing, steelmaking plants, injection plastic parts, and hollow glass manufacturing, this cutting-edge technology guarantees stringent quality checks for product surfaces.
It integrates a robust image analysis platform with AI techniques into a GPU-based edge device. Suited for manufacturers seeking comprehensive quality assurance throughout their production lines, it incorporates image acquisition and analysis devices at the edge, coupled with cloud services for image classification, annotation, and AI model training.
MAIN BENEFITS
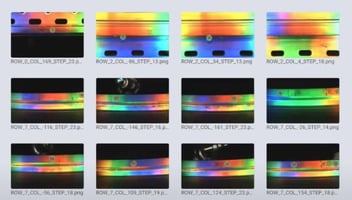
Enables the optimal management of those applications that require hard real-time and are characterized by a sparse defect dataset.
- 100% automatic inspection for inline identification of defects in production, allowing rejection or repairment.
- Efficient waste reduction, minimizing scrap, and optimizing energy consumption
- Easy integration in plant automation and management systems
- Flexibility and accuracy of AI technology
MAIN FEATURES
- Inline inspection
- AIoT solution
- Cloud classification and annotating tools
- Defects identification and features extraction for dimensional control
LEAD COMPANY

To download this information click HERE
AR-ENHANCED INSPECTOR
AR ENHANCED INSPECTOR
Fully automated inspection of wind turbine towers for painting defects in production, providing defect-detection of over 95%
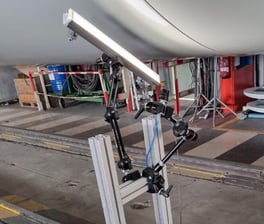
The AR-Enhanced Inspector facilitates the identification and visualization of painting defects on wind turbine towers through augmented reality, utilizing a handheld device. Its functionality encompasses initial accurate defect detection via a fully automated computer vision system.
The system aids workers in effectively addressing detected defects by guiding them through navigational overlays, enhancing their real-world environment. For seamless traceability of the repair process, workers can document repair activities by capturing pictures and adding textual or graphical annotations.
MAIN BENEFITS
- Makes inspection less error-prone, as machines are more reliable than humans.
- Saves time for workers, as they can quickly locate defects.
- Makes fixing defects less error-prone, by reliably guiding workers to defect locations via Augmented Reality.
- Makes the repair-process traceable by allowing easy documentation and annotation.
MAIN FEATURES
- Connection to the ZDZW-system for automated defect detection.
- Location of a hand-held device relative to the wind-turbine-tower-segment.
- Worker guidance via Augmented Reality.
- Immediate repair-documentation in the AR-app.
.jpeg?width=290&height=224&name=Image%2018-9-23%20at%2017.16%20(1).jpeg) .
. 
PRODUCT OWNERS

To download this information click HERE
Thermal Inspection Suite
Obtain real-time quality control for thermoforming, sealing, and welding. Through in-line monitoring and control via Digital Twins and top-tier AI algorithms, these solutions minimise process variability, offering a streamlined approach to thermal manufacturing quality. Benefit from immediate defect detection and eliminate complexities in reworking defective parts.
WELDING PROCESS MONITORING
WELDING PROCESS MONITORING
Online welding defect detector, enabling early detection of potential flaws during welding operations, leading to significant time and material savings
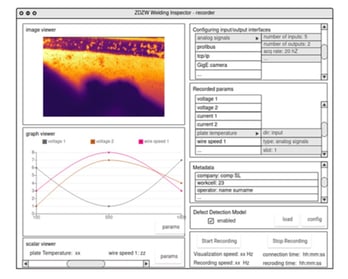
This solution caters specifically to welding SMEs with a notable expertise in automation but a moderate level of digitalization. It aids SMEs in monitoring their systems and leveraging advanced data analysis techniques for effective data modeling. This facilitates the creation of an online defect detection system, alerting users to possible defects during welding processes.
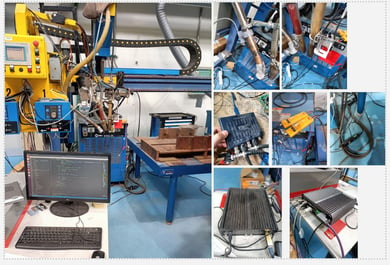
For this solution, a software and hardware system are installed within welding facilities to gather real-time data from the welding process. In the subsequent stage, the collected dataset undergoes analysis and correlation with Non-Destructive Testing (NDT) information. This analysis aids in the creation of predictive models for online defect identification.
MAIN BENEFITS
With the Welding Process Monitoring solution it’s now possible to predict online defects with AI analysis that is scalable and adaptable to different welding processes
- Can be adapted to different welding processes.
- Easy to add new sensor and communication protocols.
- Offers a powerful tool to analyze the real welding process.
- Enables an early actuation on defect correction, reducing waste on reworking time and scrap.
MAIN FEATURES
- Adaptable
- Scalable
- Process monitoring
- Online defect prediction
PRODUCT OWNERS

To download this information click HERE
HEAT TRANSFER DIGITAL TWIN
HEAT TRANSFER DIGITAL TWIN
Reduces the defect on thermoforming process up to 50%, reduces the material consumption at least 5% and increases the OEE by around 10%
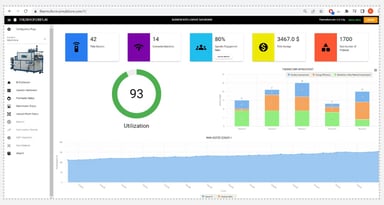
This Thermoforming Digital Twin (SaaS) specifically caters to appliances and automotive companies, going beyond mere monitoring solutions available in the market. It prevents scrap generation and optimizes plastic thickness and energy consumption, ensuring enhanced efficiency in production.
This advanced digital twin simulates both thermal effects and material deflection caused by thermomechanical loads. It utilizes temperature measurements to calibrate heating elements, employing radiative heat transfer formulations for precise adjustments.
MAIN BENEFITS
Thermoforming Digital Twin will help thermoformed plastic part manufacturers to reduce raw material & energy consumptions thanks to its optimization algorithm and defect prevention capability.
- Helps thermoformed plastic part manufacturers to reduce raw material & energy consumptions thanks to its optimization algorithm and defect prevention capabiliy
- Reduces the thickness, scrap and cost
- Reduced cycle time
- Increased throughput
MAIN FEATURES
- 3D Heat Transfer simulation
- Optimization of heater temperatures and heating cycle
- Calibration via real-time data connection to existing thermocouple sensors
- Failed heater compensation
.jpeg?width=413&height=200&name=Image%2023-8-23%20at%2014.50%20(1).jpeg)
PRODUCT OWNER
![]()
To download this information click HERE
IR THERMAL IMAGING
IR THERMAL INSPECTION
Real-time thermal imaging to monitor the thermoforming and heat-sealing processes in the production line
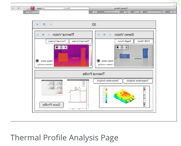
1. Thermoforming App: It monitors thermal images of heated and formed plastic sheets during the thermoforming process. This edge-based solution incorporates closed-loop communication control with a digital twin, offering real-time thermal data monitoring in 2D/3D and quality control of produced plastic sheets.
It is oriented to industries involved in plastic thermoforming. This solution caters to home appliance manufacturers, automotive manufacturers, and similar sectors engaged in thermoforming processes.
The main benefits are:
- Monitors thermal images and detect the defects in real time.
- Generates 2D/3D thermal profile of the produced plastic parts.
- Edge-based system, detecting defects in thermal imaging that might not be visually discernible.
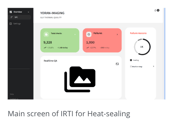
2. Heat Sealing Process App: It oversees the filling and sealing process of all products through non-intrusive inline inspection. It provides real-time 4D data, enabling comprehensive monitoring and control of every step within the heat-sealing process.
This solution serves industries involved in heat-sealing or induction sealing of various packaging types, including capsules, bottles, flow packs, and others.
The main benefits are:
- Allows preventive maintenance for good process sequence.
- Real-time about bad process trends.
- Accurate system, detecting defects in thermal imaging, which may not be visually evident.
PRODUCT OWNERS
![]()
To download this information click HERE
MEET OUR AMBASSADORS

Uzoma Agba
Business Tech Professional and a Startup Advisor associated with Seedstars, Techstars, Google for Startups, Google Hustle Academy, and serves as a Domain Expert with Carbon 13. Her expertise encompasses various sectors, including Smart Manufacturing, Fintech, Health, Agriculture, Digital Startups, Startup Education, Tech Hubs, Social Impact, and Media in Europe.
Uzoma's experience is evident in B2B and B2C domains, covering business development, sales, marketing, product design, and product management across different accelerator and incubator programs. Dedicated to creating impact-driven solutions, they focus on benefiting professionals, corporate organizations, and startups.

Maja Fisic
Growth Strategist and Business Development Expert specializing in the development and execution of growth strategies for both startups and established entities across various fields, including agtech, food tech, Industry 4.0, biotech, and energy.
Her expertise encompasses supporting innovation funding, overseeing acceleration programs, and crafting comprehensive growth strategies for businesses or specific units.
At present, she is in charge of the DRG4Food Open Calls and Pilot Program, where she utilizes her acceleration services experience to facilitate business development and innovation.

Serdar Yucel
A prolific C-level Executive, Partner, Adviser, Coach, Mentor to international companies/NGOs. Experienced in Technology, Innovation, Business related to Communications (Fixed, Mobile, Satellite), Services (Financial, Consultancy, Engineering, SW), IT, Energy, Mobility, Academy across EU, C.Asia, M.East, Africa, APAC, LATAM, US, TR. Resilient, resourceful, diligent in Sales / People / Program Management with MBA (UK university) & PMP.
JOIN OUR ONLINE COMMUNITY!
You can ask any questions you might have there and we'll get back to you HERE


The ZDZW project has received funding from the European Union’s Horizon Europe programme under grant agreement No 101057404.